

Zoom has become an indispensable tool for education, whether it's for a class with your medical director, protocol rollout, or virtual care review. With such a wide range of uses, the ability to record these sessions for later review, sharing, or content creation has become equally important. However, simply pressing the "record" button isn't enough to harness the full potential of what Zoom recordings can offer. To truly maximize the value of your recordings, it's essential to delve into Zoom's advanced features, particularly the ability to record individual files for gallery view, presentation view, and active speaker view.
These features not only enhance the flexibility and quality of your recordings but also provide a level of detail and control that can significantly improve the viewer's experience. Understanding how to leverage these Zoom recording options is key.
In this blog, we'll guide you through the ins and outs of maximizing your Zoom recordings. From preparing your setup for the best audio and video quality to managing and sharing your recorded files effectively, we'll cover everything you need to know to take your Zoom recordings to the next level. Let's dive in and unlock the full potential of your Zoom sessions.
Why Zoom Recording Features Matter
In the age of online learning and digital collaboration, the ability to capture and share the essence of live interactions has never been more crucial. Zoom recordings serve as a bridge, allowing us to revisit, analyze, and disseminate the knowledge and moments shared in these digital classes. But to truly capitalize on this resource, understanding and utilizing Zoom's advanced recording features can significantly amplify the value of these digital records. Here’s why:
Improved Content Quality and Engagement
Content creators can leverage these features to produce more engaging and professional-looking videos. By having the ability to switch between views in post-production, you can create a dynamic viewing experience that holds the audience's attention. This is particularly useful for webinars, tutorials, and online courses, where maintaining viewer engagement is key to success.
Versatility and Customization in Content Creation
Having separate files for each view gives content creators and educators a higher degree of versatility and customization. You can tailor the final output to suit the specific needs of your audience or the requirements of the platform where the content will be shared. This level of customization can set your content apart in an increasingly crowded digital space.
Zoom's recording features are not just about capturing content; they're about enhancing the quality, accessibility, and effectiveness of that content. By understanding and utilizing these features, you can maximize the impact of your digital interactions, making them more valuable for everyone involved.
Preparing for Your Zoom Recording
To ensure the highest quality for your Zoom recordings proper preparation is key. This section will guide you through the essential steps to set up your environment and equipment, ensuring your recordings are clear, professional, and effective.
1. Check Your Equipment
Audio: Good audio quality is critical. Use a high-quality microphone if possible. Test your microphone beforehand to ensure it's working correctly and that the audio levels are optimal. Background noise can be distracting, so consider using a microphone with noise cancellation or recording in a quiet space.
Video: A clear video feed enhances the viewer's experience. Ensure your webcam is of decent quality. Clean the camera lens for a crisp image, and position the camera at eye level for a natural perspective. Good lighting is essential; face a light source to avoid backlit effects that can obscure your face.
2. Optimize Your Recording Space
Lighting: Soft, natural lighting works best. Avoid harsh lights directly above or behind you to prevent shadows or overexposure. Ring lights or adjustable LED panels can provide consistent lighting if natural light is insufficient.
Background: Keep your background professional and non-distracting. A plain wall, a tidy office, or a simple backdrop can keep the focus on you. Zoom's virtual backgrounds are an option, but they can sometimes cause visual artifacts around you, especially if your physical background is complex or if lighting is poor.
Internet Connection: A stable and fast internet connection is crucial for high-quality live video. Wired connections are more reliable than Wi-Fi. Close unnecessary applications and devices connected to your network to ensure maximum bandwidth for your Zoom session.
3. Zoom Software Settings
Before your meeting, go into Zoom's settings to adjust the video and audio options. Enable HD video if your internet speed supports it. In the audio settings, activate noise suppression to reduce background noise.

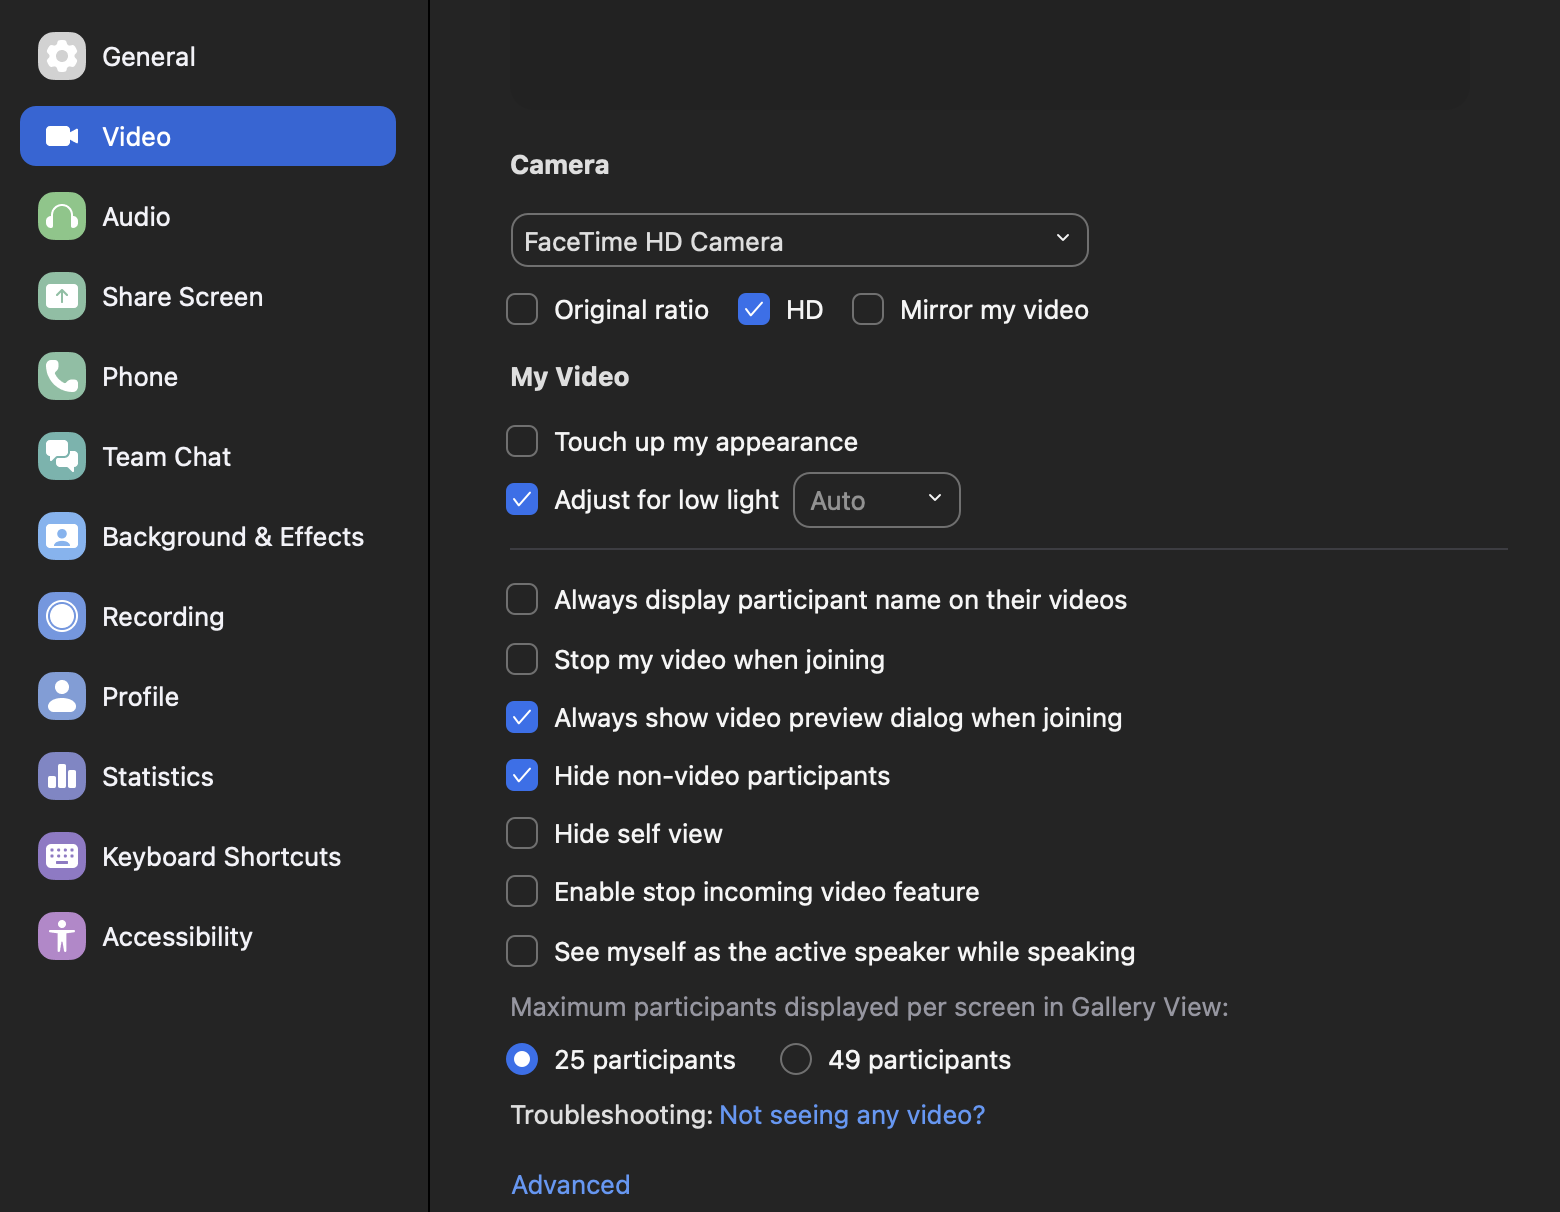
Familiarize yourself with the recording settings. Choose a destination folder for your recordings that’s easy to find and has ample space. If you’re using cloud recording, ensure you understand how to access and download your recordings after the session.
4. Testing
Conduct a test run before the actual event or meeting. Record a short video on Zoom using the settings you plan to use. Pay attention to your audio clarity, video quality, and whether all relevant parts of your screen are visible when sharing.
Review the test recording to check for any issues with audio, video, or content visibility. Make adjustments as necessary, and don't hesitate to test multiple times to achieve the best possible setup.
Taking the time to properly prepare for your Zoom recording can make a significant difference in the quality and effectiveness of your final content. By ensuring that your audio and video are clear, and your recording environment is optimized, you can enhance the viewing experience for your audience, regardless of the content you’re sharing.
Understanding Zoom Recording Settings
Navigating Zoom's recording settings is crucial for anyone looking to make the most out of their meeting recordings. This section provides a detailed walkthrough of accessing and configuring Zoom recording settings to ensure you capture your meetings, webinars, or classes in the way that best suits your needs.
Accessing Recording Settings
Local vs. Cloud Recording: Zoom offers two primary recording options: recording locally on your computer or recording to the cloud. Local recordings are saved to the device you're using to host the meeting, while cloud recordings are saved to Zoom's servers and accessible from anywhere via the web. If you are looking to record separate files, stick with Cloud Recording.
Setting Preferences: To adjust your recording settings, you need to access the Zoom Settings menu. This can be done through the Zoom desktop client by clicking on your profile picture and selecting "Settings," then navigating to the "Recording" tab. For cloud recording settings, you will need to log in to your account on the Zoom website, go to "Settings," and then the "Recording" tab.
Configuring Local Recording Settings
Selecting a Recording Location: In the local recording settings, you can choose the folder where your recordings will be saved. It’s advisable to pick a location with ample storage space, as video files can be large, especially for longer meetings.
Recording Separate Audio Files: For meetings where you want to record separate audio files for each participant check the option for "Record a separate audio file for each participant".

Configuring Cloud Recording Settings
Recording Separate Files: For meetings where you want to record separate audio files for each participant or capture speaker and gallery views separately, check the option for "Record a separate audio file for each participant" and “Record active speaker, gallery view and shared screen separately.” This is our recomended setup and gives you the most flexibility during editing.
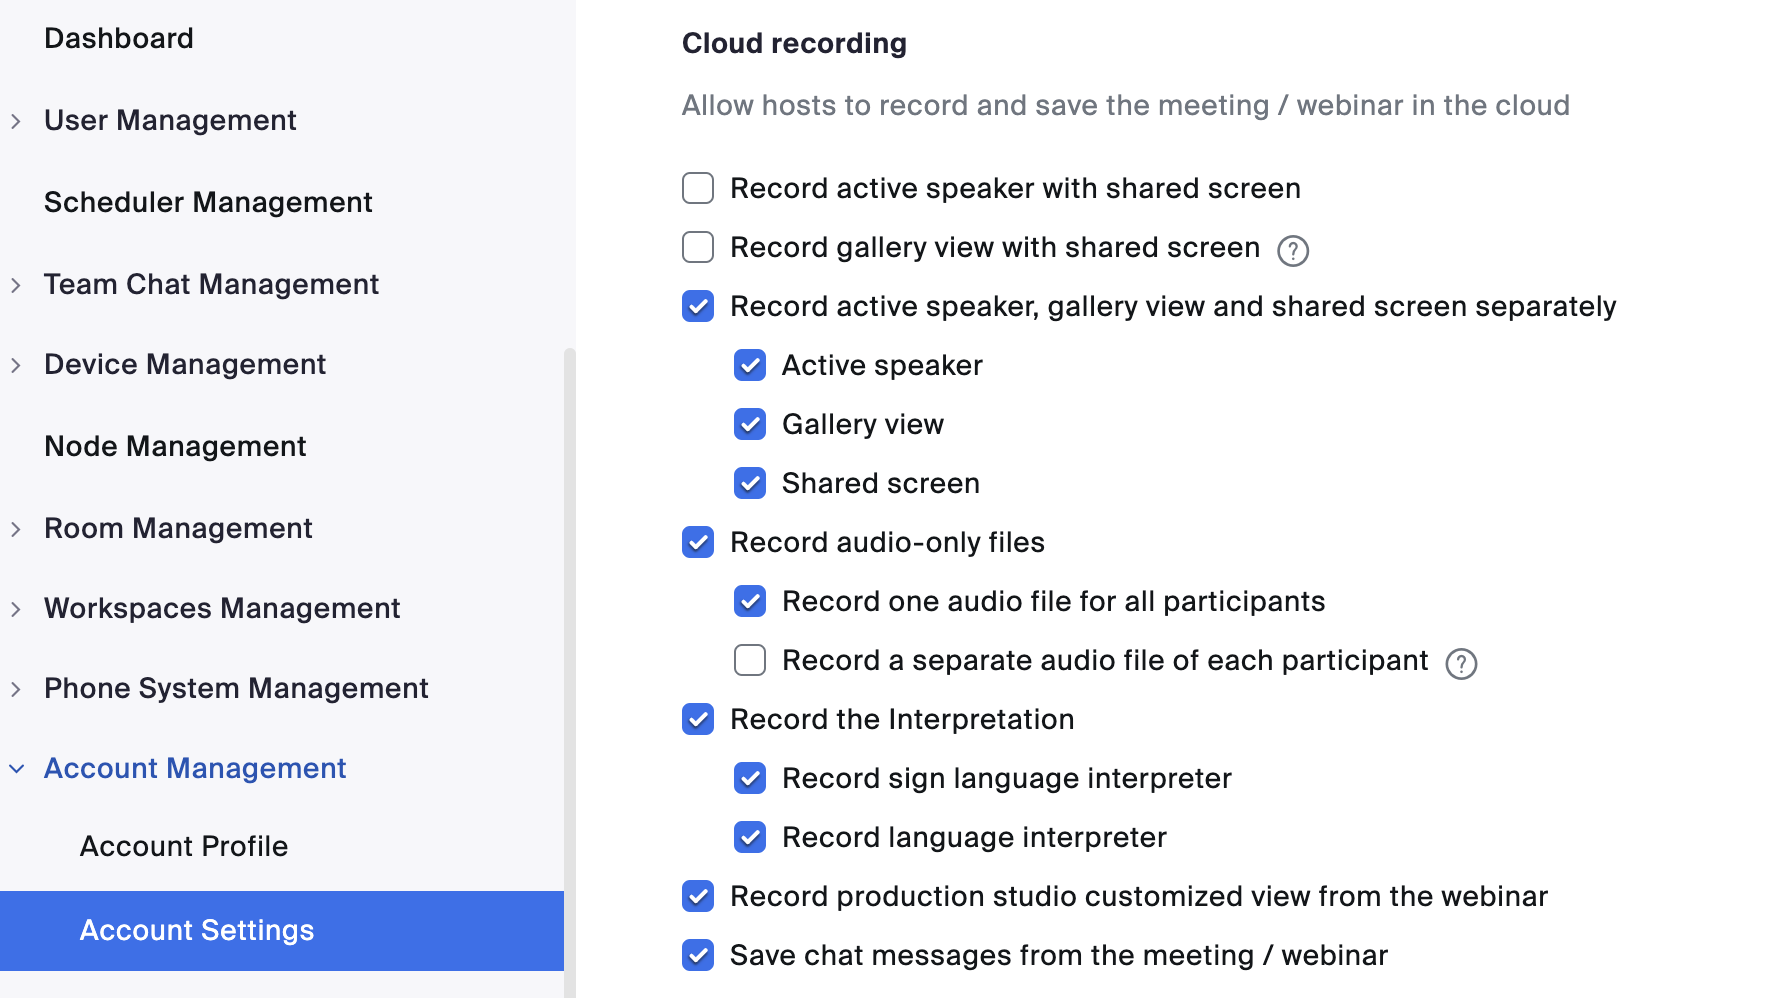
Advanced Cloud Recording Settings: Cloud recording offers additional options, such as recording audio transcripts and managing recording file types. You can enable settings to automatically transcribe audio to text, making it easier to review or search through recordings later.
Storage Management: Be mindful of your cloud storage limit. Regularly review and download important recordings to avoid unexpected deletions due to storage policies.
Recording Permissions and Notifications
Granting Permission to Record: As a meeting host, you can grant recording permission to participants. This is done through the "Participants" menu during a live meeting.
Notification of Recording: Zoom automatically notifies participants when recording starts. This feature is designed for privacy and consent compliance and cannot be disabled. Ensure participants are aware and comfortable with being recorded.
Tips for Effective Recording Management
Recording without Interruption: If you need to pause or stop the recording during a meeting, you can do so via the recording controls. Pausing and resuming allows you to manage what content gets recorded without creating multiple video files.
File Naming and Organization: After the meeting, take the time to rename and organize your recordings if necessary. This will make it easier to locate specific recordings in the future.
Pre-Meeting Preparation
Inform Participants: Before starting your meeting, inform participants that you will be recording the session in multiple views. This ensures transparency and allows participants to opt-out if they're uncomfortable with being recorded.
Check Your Settings: Double-check your recording settings before each meeting to ensure that the options to record each view separately are still selected. Settings can sometimes revert to defaults after updates or changes in account status.
During the Meeting
Start the Recording: Once your meeting begins and you're ready to start recording, click the "Record" button on the Zoom toolbar. If you have both local and cloud recording options enabled, you'll be asked to choose which one you prefer. Select the one that matches where you've enabled separate view recordings.
Managing the Views: During the meeting, be mindful of the views you and your participants are in. While Zoom will record the different views separately, the active speaker view will switch based on who is speaking. The gallery view will show multiple participants, and the presentation view will capture shared screens.
After the Meeting
Accessing Your Recordings: Once your meeting concludes and the recording stops, Zoom will process the files. For cloud recordings, you'll receive an email notification when they're ready to view and download. For local recordings, the files will be saved in the designated folder on your computer.
By understanding and configuring Zoom's recording settings to fit your specific needs, you can ensure that your recordings serve as a valuable resource for participants, students, or content audiences. Whether you prefer the flexibility of cloud recording or the control of local recording, Zoom offers the tools you need to capture your meetings effectively.
Conclusion
Zoom has become more than just a tool for virtual meetings; it's a versatile platform that can enhance communication, education, and content creation across various domains. By understanding how to maximize the features of Zoom, particularly the advanced recording options, you can transform your standard online class into valuable resources that offer enhanced accessibility, engagement, and clarity.
This guide has walked you through the essential steps and provided advanced tips to help you make the most of your Zoom recordings. From preparing your recording environment to ensure high-quality audio and video, to navigating Zoom's recording settings for capturing individual files for gallery, presentation, and active speaker views. We've also delved into post-recording tips for managing, editing, and sharing your Zoom recordings effectively, along with some advanced strategies for elevating your content.
Remember, the goal of maximizing your Zoom recordings is not just about capturing content but about creating a more impactful, engaging, and accessible experience for your audience. As you experiment with these settings and techniques, don't be afraid to try new approaches and see what works best for your specific needs. Technology is constantly evolving, and so are the ways we can use it to enhance our communication and content creation efforts. By staying curious and open to experimentation, you can continue to discover new ways to leverage Zoom recordings for your advantage.
We encourage you to share your experiences and tips with others. The Prodigy community thrives on shared knowledge and collaborative improvement. Your insights could help others find new solutions and approaches to common challenges.
Zoom recordings offer a wealth of possibilities for enhancing digital communication and content creation. By mastering these features and employing creative strategies, you can unlock new levels of effectiveness and engagement in your virtual interactions. Here's to elevating your Zoom experiences to their fullest potential!